If you are only scheduling part of your campus or building using Events2HVAC with CollegeNet 25Live room scheduling, you can reduce the load on your computer systems by creating a pre-defined location search to pull data from R25 only for the rooms that Events2HVAC controls. For example, if you have 2,000 rooms, but you are only scheduling 40 of them with Events2HVAC, you can filter those rooms in R25 so that only schedules for the 40 rooms needed are passed to Events2HVAC.
The following example demonstrates how to create a location search in CollegeNet 25Live using the advanced location search tools. This method will show you how to add individual locations to your locations list and save the query for later use. You can also create a search based on a feature or custom attributes.
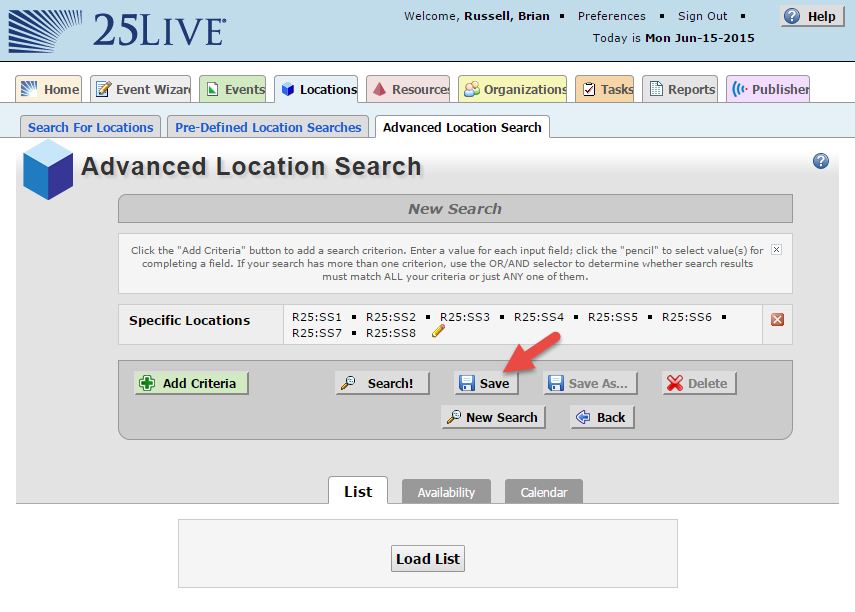
1. Create a New Advanced Location Search
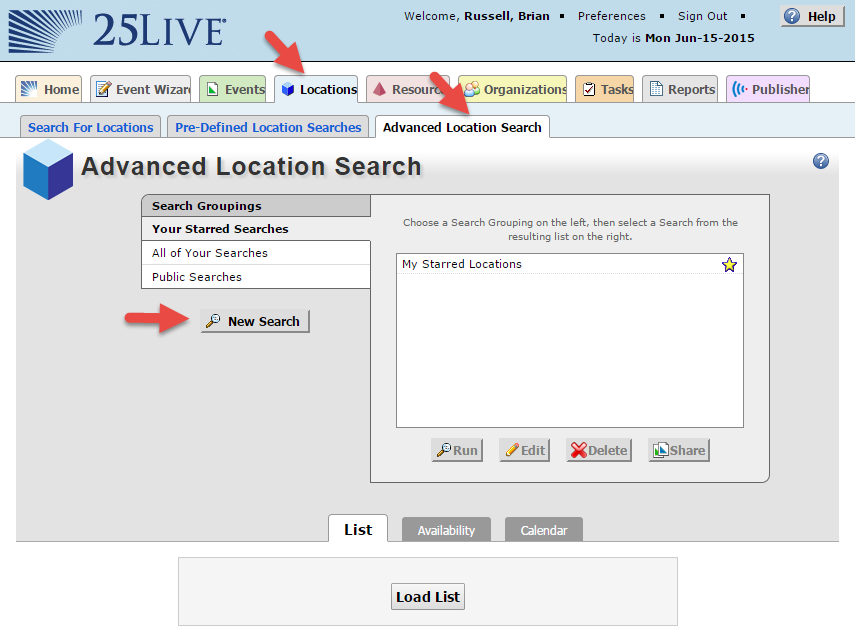
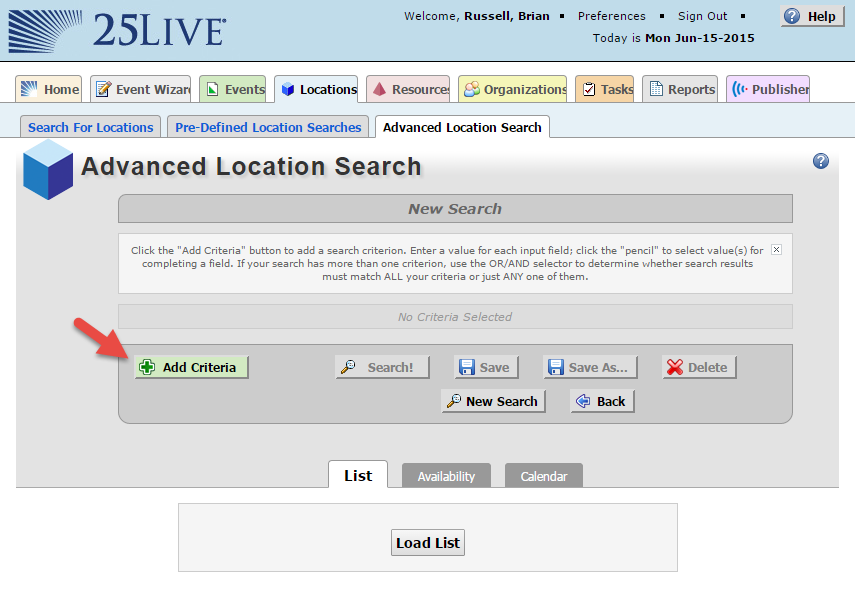
Add a new Criteria:
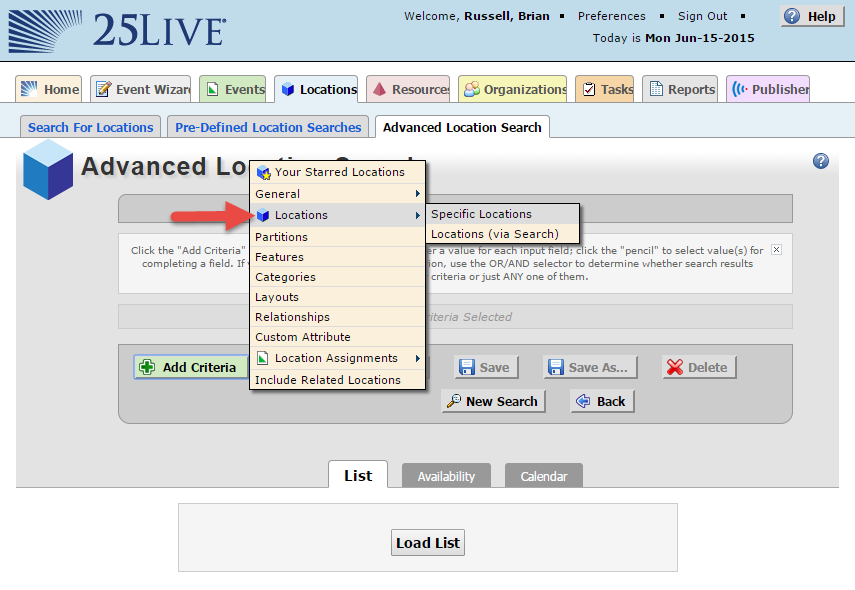
Select Locations | Specific Locations
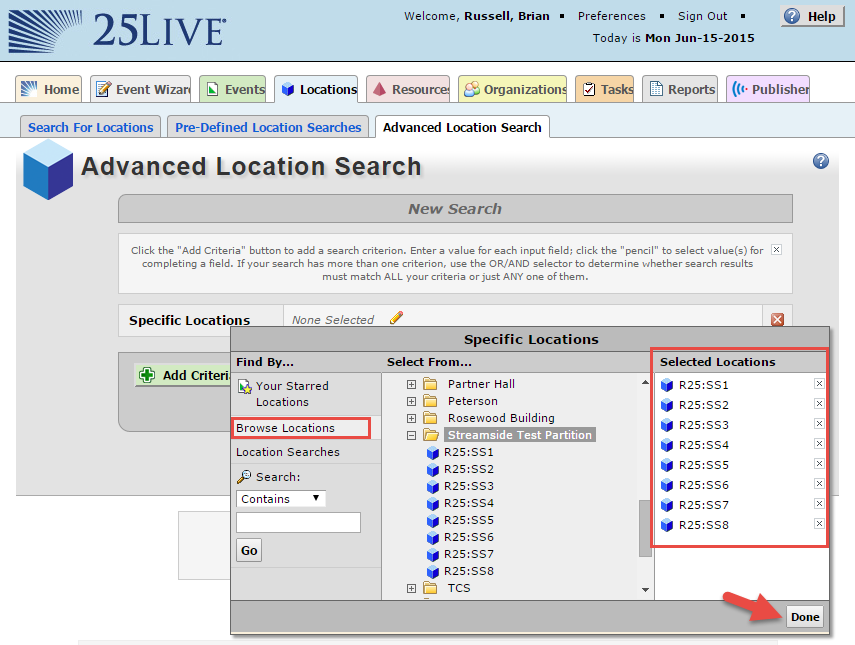
Select the rooms you want to add and move them to the right pane.
Hit the Save button
Enter the name of the search.
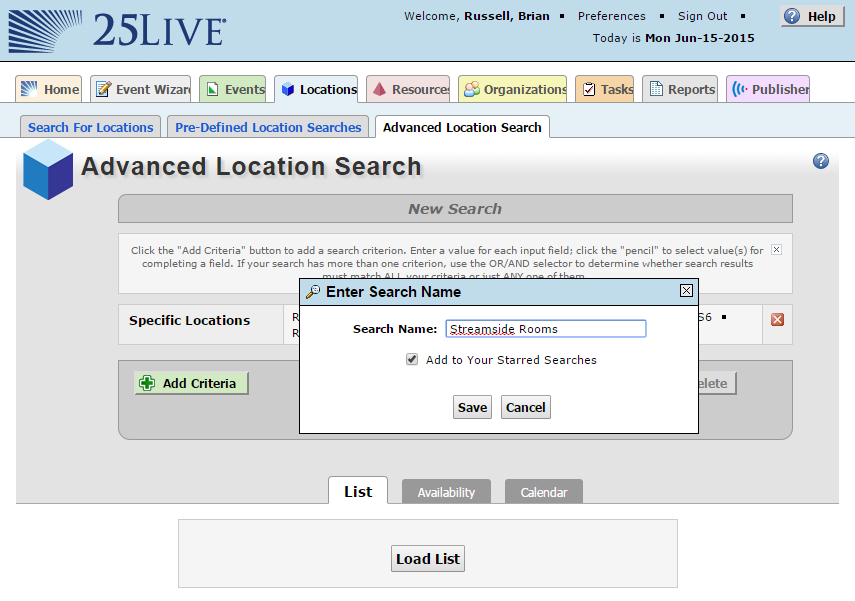
This concludes the setup of the search in CollegeNet 25Live.
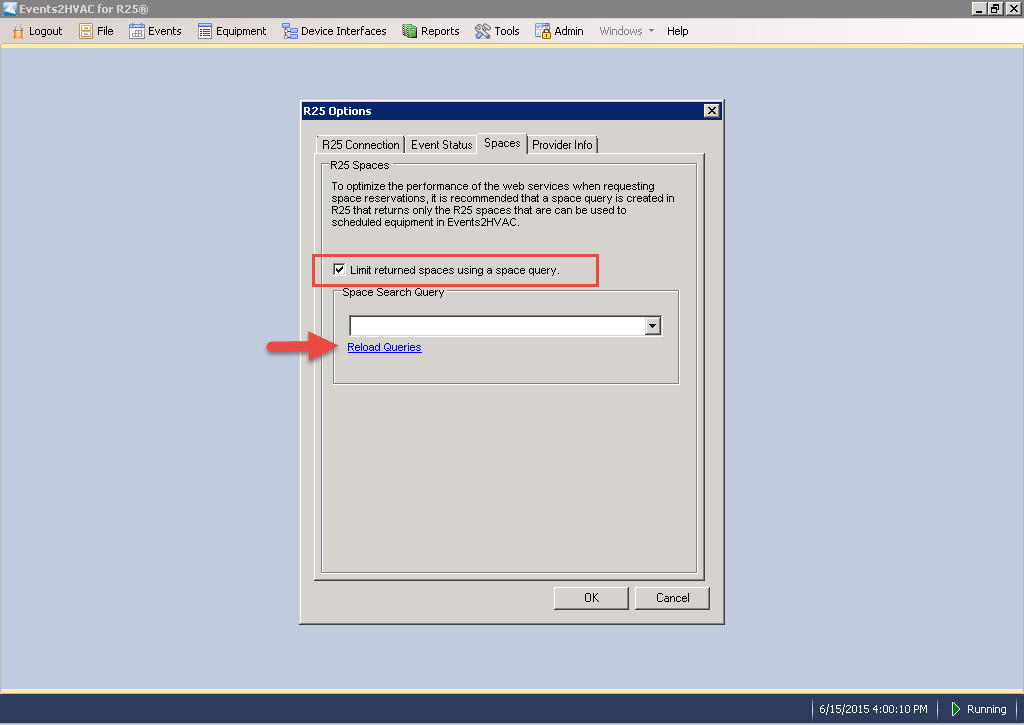
2. Enable the search query in Events2HVAC
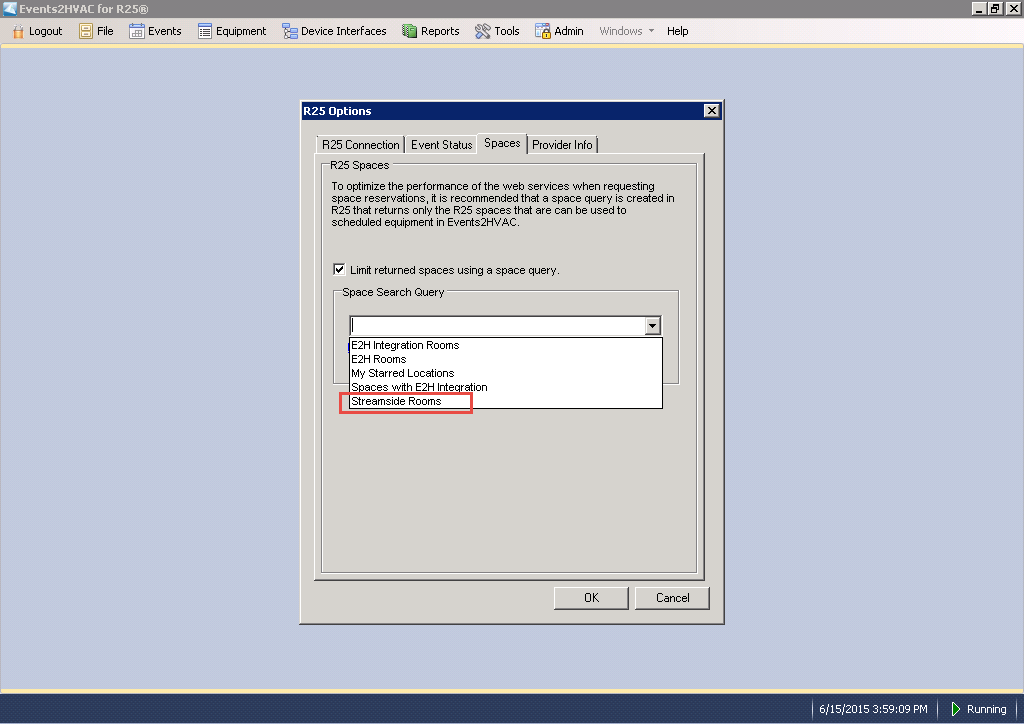
In Events2HVAC select Events > R25 Options. In the pop-up window, navigate to the Spaces tab. Check the "Limit returned spaces using a space query" checkbox. Click Reload Queries to retrieve all space queries from R25. Select the query that you created above.
Select the saved location search from the first step
Verify that the space query is working. Open the Room List tab by selecting in the main menu Events > Room List Hit the Rebuild button to clear the room cache and rebuild the list from R25.
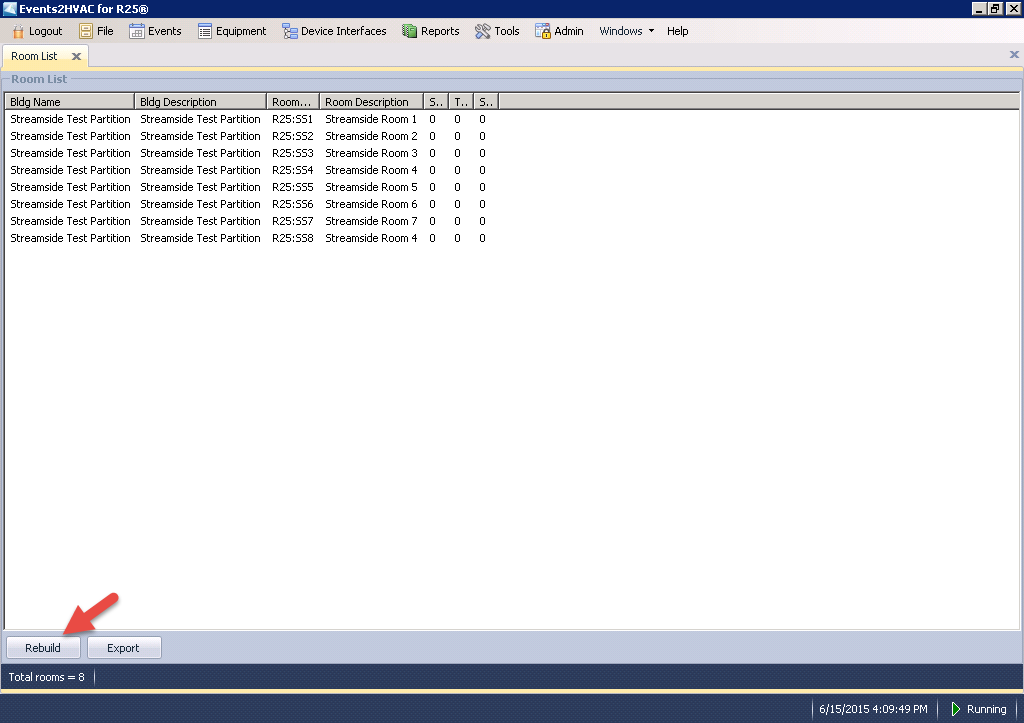
You should only see the rooms from the location search query.
Related:
0 Comments